Today we’ll show you how to set up a beautiful, beginner-friendly nano aquascape for a betta fish, using mostly our easy-category PLANTIT! In-Vitro cups.
An island style layout was selected to provide a natural look with a bushy highlight.
This style of layout can be maintained with regular trimmings to create a neat, compact look, or allowed to grow wild for more of an untamed jungle variation.
As previously mentioned, all Dennerle Plants easy category species were selected to create an aquarium, that is easy to maintain.
While all plants will benefit from CO2, quality lighting, and nutrients, these factors are not absolutely necessary for our easy category plants.
PLANTIT! In-Vitro cups were chosen due to their exceptional quality and large portion sizes. They are grown in sterile, laboratory conditions, guaranteeing a healthy, snail-free, algae-free, and pesticide- free start.
Now let’s get started designing a living home!
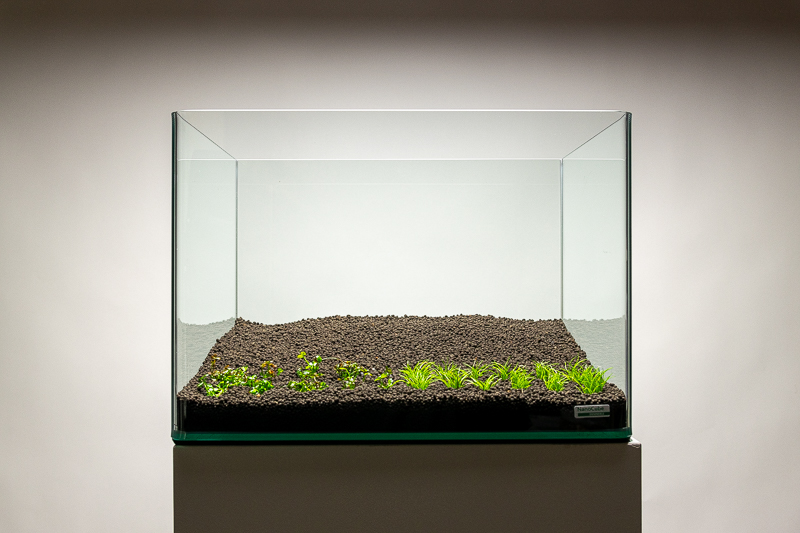
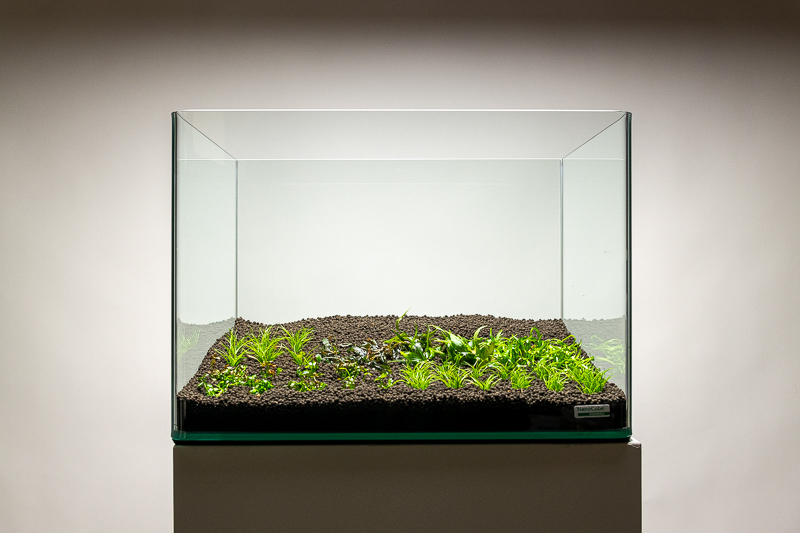
First, add one 6 liter bag of a clay-based aqua soil. Using aqua soil specifically developed for the planted aquarium, provides optimal conditions for housing beneficial bacteria and storing vital nutrients that the plant roots need to thrive. Slope the substrate slightly toward the back, to provide a look of increased depth.
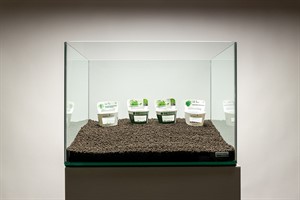
Next, using the PLANTIT! In-Vitro cup labels, divide the substrate into three rows: Background, Midground and Foreground. Each row should contain four plants, from left to right. The background will contain the tallest plants, and the foreground will contain the shortest plants. This helps establish a sense of depth and scale in your aquarium.
|
Background
|
Midground
|
Foreground
|
If this is your first aquarium, we recommend sticking to the recipe and using the same species as us. If you’re a more advanced planted tank hobbyist, feel free to substitute any of the plants for different species of your liking.
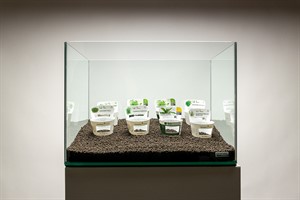
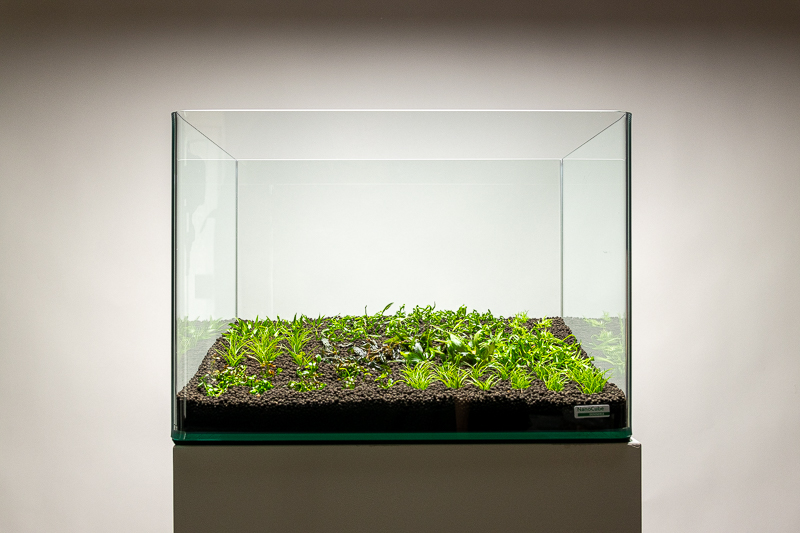
We recommend planting with one cup per palm size of soil, but additional plants can be added to provide an even denser look from the start. After dividing each In-Vitro cup into 4-6 portions, use a pair of aquascaping pincettes to bury the plant portions into the soil so that they are firmly positioned.
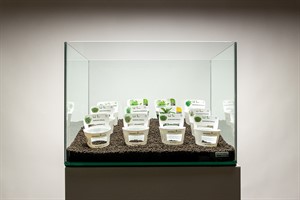
Planting the foreground
We’ll work from left to right. First add the two cups of Marsilea hirsuta. These are tiny clover-like plants that work great in the foreground. Next, add the two cups of Eleocharis pusilla on the right. These are finely textured grassy plants that can be trimmed short when kept in the foreground. Eventually, the Eleocharis and the Marsilea will blend to create a very natural look.
Planting the midground
Once again, we’ll plant from left to right. First, add one cup of the Eleocharis pusilla. This can be allowed to grow a bit taller in the midground to provide some height. Next, add Hygrophila pinnatifida for some color and textural contrast. On the right side, add Cryptocoryne x purpurea to continue our trend of color contrast. Finally, add Helanthium tenellum 'Broad Leaf' all the way on the right to frame the red plants, and finish up our midground. All of these plants will provide a combination of height, color, and textural contrast to define the midground and separate it from the foreground.
Planting the background.
First, add Helanthium bolivianum 'Quadricostatus' on the left side. This will provide a tall, grassy look. Next, add two cups of Heteranthera zosterifolia, from left to right, in the middle of the background. These will form the tall, rear center of our island layout and will eventually blend with the midground to provide a natural look. Finally, let’s finish framing the island on the right with the addition of Pogostemon deccanensis. Normally, the same plants are added on the left and right of a layout to provide balance, but a little asymmetry can provide the very sought-after aesthetic of nature’s chaos.
Now it’s time to fill the tank with water and attach the hardware
To fill the tank with water, we layed out a couple sheets of paper towels and used a Filter Inflow to gently spread the water flow. Start slowly and increase the water flow as you go.
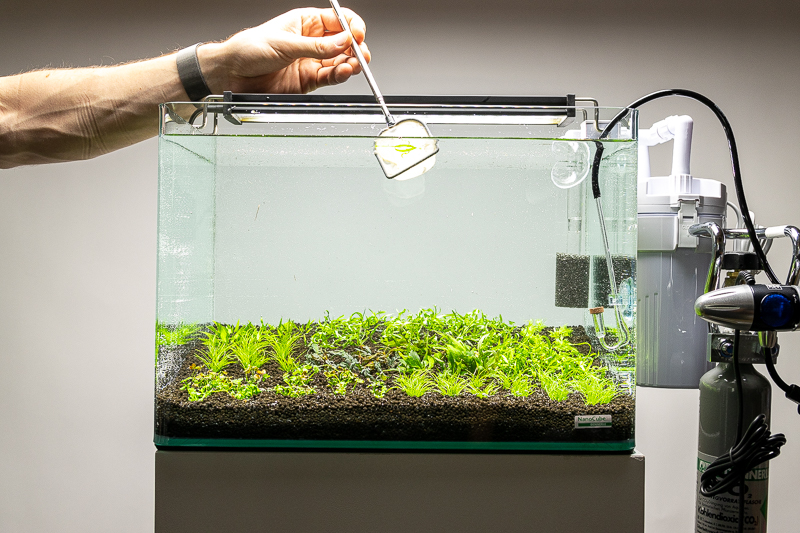
Finally we added a pressuirzed CO2 system and used a fishing net to remove floating particles.
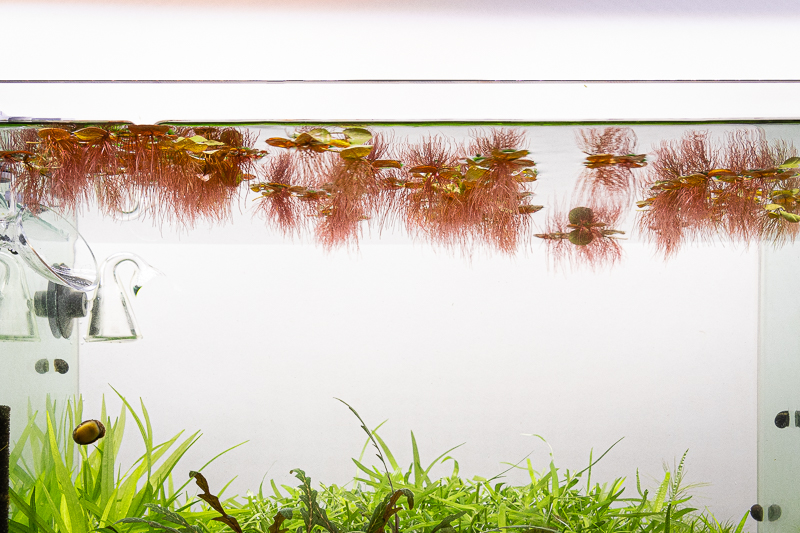
Floating plants were added, to help absorb excess nutrients and reduce the chances of nuisance algae taking hold. We decided to add the stunning red root floater, Phyllanthus fluitans, but you can substitute any floating plant of your liking.
Maintenance routine:
- For the first week, we recommend doing daily 50% water changes, as the new soil will be releasing ammonia.
- In the second week, we advise water changes every other day.
- During the third week, you’ll do water changes every two days, and so on, until you get to one 50% water change per week.
- A complete liquid fertilizer can be added two weeks after setup and dosed daily or weekly, depending on your lifestyle.
- Light and CO2 are best set on a 7h/day timer
Evolution of the aquascape
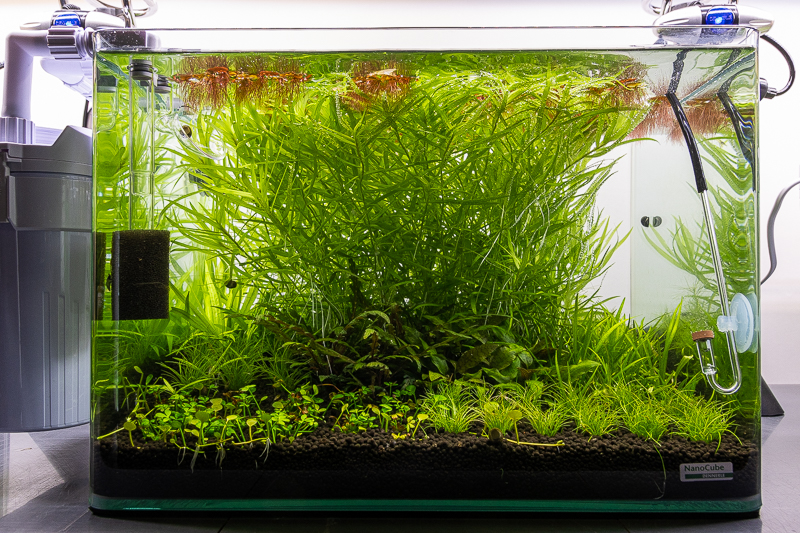
Two weeks after setup, the plants have establishing well, with noticeable growth everywhere. The algae crew, composed of horned Nerite snails and Neocaridina shrimp, are added to help keep algae at bay. Click here to read more about Algae Prevention.
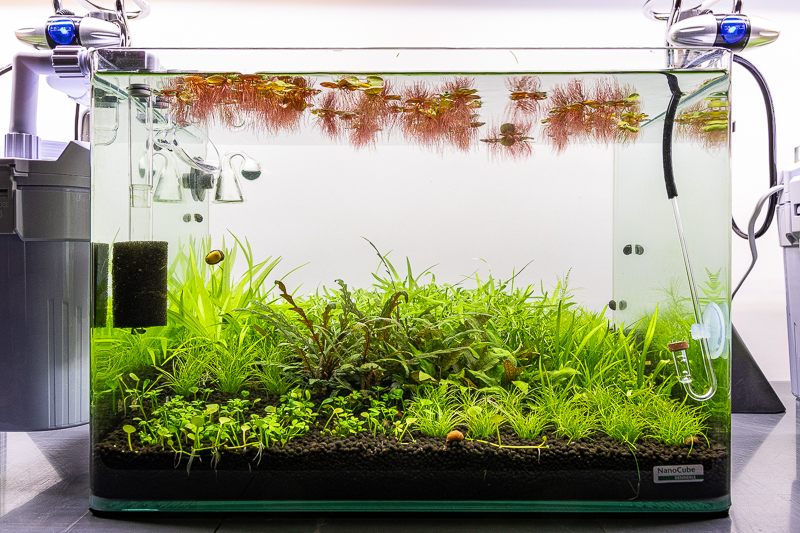
A first careful trimming of the fast-growing stems and runners, can help reinforce the intended shape of the layout.
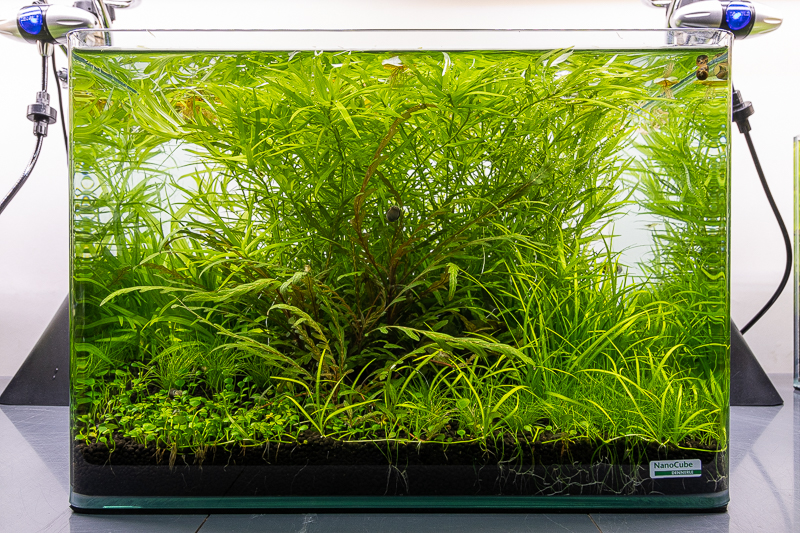
Six weeks after setup, the plants are well rooted and are absolutely thriving. Notice the wild growth of the Heteranthera zosterifolia. This plant is a fast grower and will benefit from a trim every two weeks to prevent it from dominating the layout. Helanthium runners can also be pruned to keep them tidy and in position.
Final stage
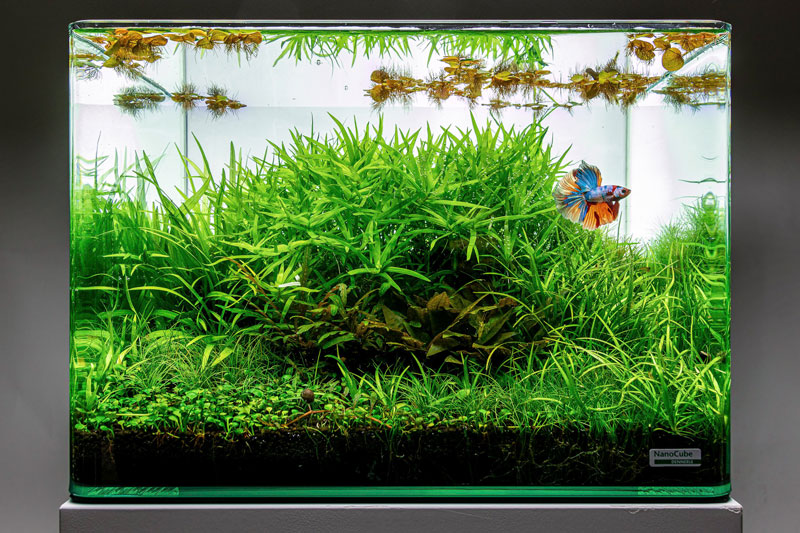
Eight weeks after setup, the layout is fully mature, and after a careful trimming, is ready for its final photograph. We’ve decided to name this beautiful nano layout “Shibui”, a Japanese term describing something that is simple, aesthetic, and unobtrusive in its beauty. While most of the plants have a grassy look, their subtle differences blend well, with varying shades of green and unique leaf patterns. The addition of a stunning Betta fish, adds a splash of color and resembles a butterfly in a grassy field.
Details
|
Creator:
|
Jurijs Jutjajevs
|
|
Title:
|
Shibui
|
|
Aquarium:
|
40x32x28cm aquarium
|
|
Volume:
|
35 liters
|
|
Light:
|
LED 18watt 8h/day
|
|
Substrate:
|
Soil (6 liters)
|
|
Hardscape:
|
-
|
|
Filter:
|
Hang on the back filter (360 l/h)
|
|
Filter media:
|
Bio-filter material and fine filter pad
|
|
Co2:
|
Pressurized Co2 with Solenoid
|
|
Fertilizer:
|
All-in-one fertilizer
|
|
Maintenance:
|
30 mins per week
|
Plants:
1x Cryptocoryne x purpurea
3x Eleocharis pusilla
1x Helanthium bolivianum 'Quadricostatus' (helping plant)
1x Helanthium tenellum 'Broad Leaf'
2x Heteranthera zosterifolia
1x Hygrophila pinnatifida
2x Marsilea hirsuta
1x Phyllanthus fluitans (helping plant)
1x Pogostemon deccanensis
Livestock:
1x Betta splendens
10x Clithon corona
20x Neocaridina sp.
(kindly provided by Aquarium-Dietzenbach)
Back to list