Let’s get started designing today’s living home!
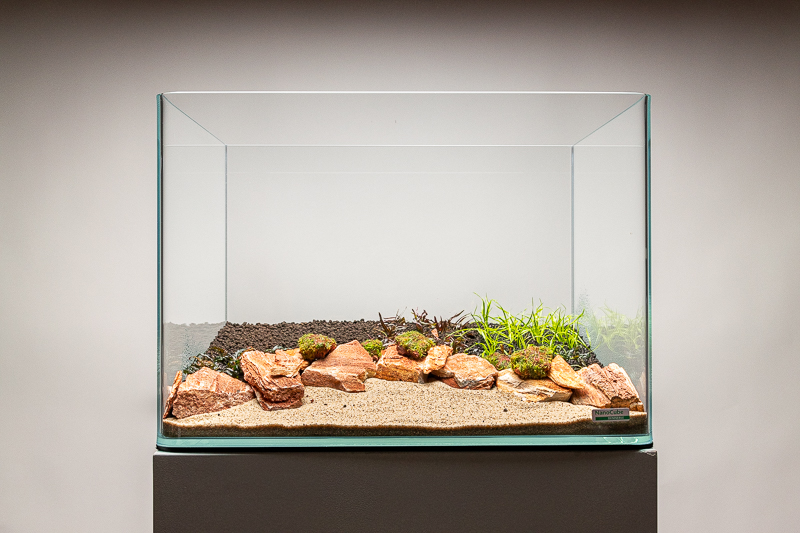
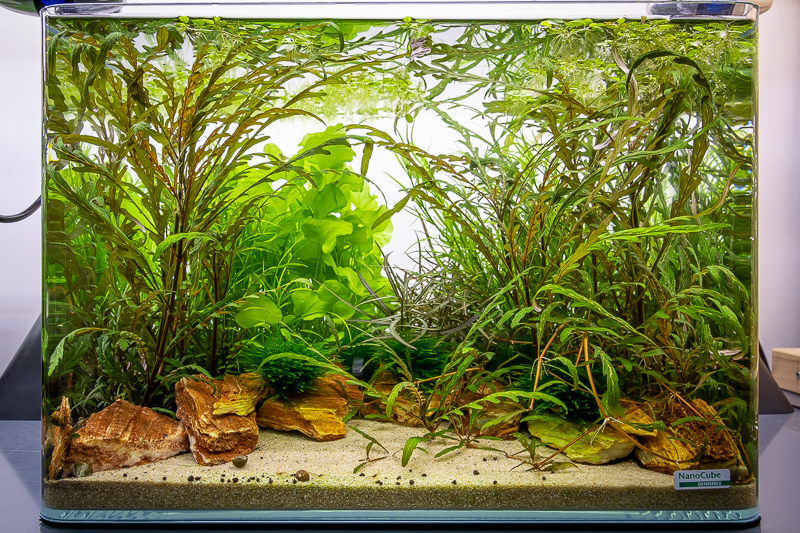
This concave-style layout features a beautiful cosmetic sand foreground with an open space in the central background of the coomposition.
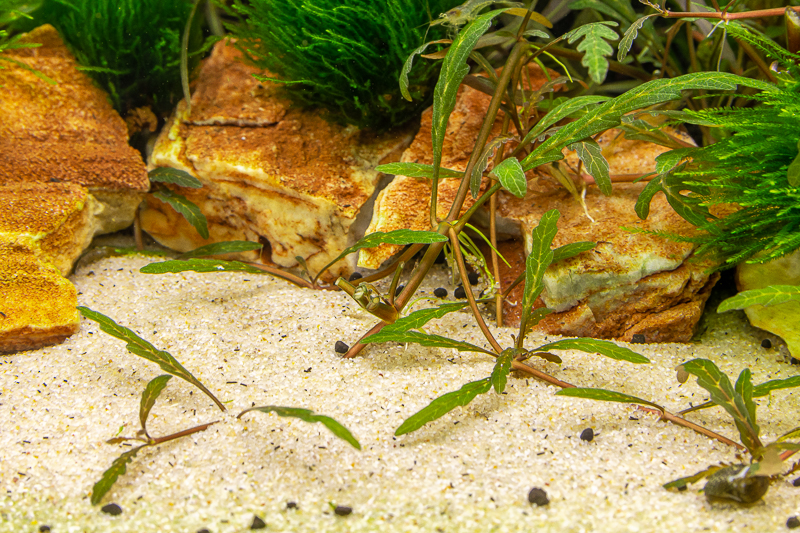
The Samurai Stones provide high-impact contrast between the planted sections of the tank and the cosmetic sand in the front.
Additionally, a sand foreground acts as an open playground for some ornamental shrimps.
First, we’ll lay down the two substrate layers. In order to prevent the cosmetic sand from mixing with the aqua soil, place a substrate divider to provide a temporary barrier.
With the divider firmly in place, fill the rear of the tank with Soil. Slope the substrate slightly toward the back to provide a sense of depth.
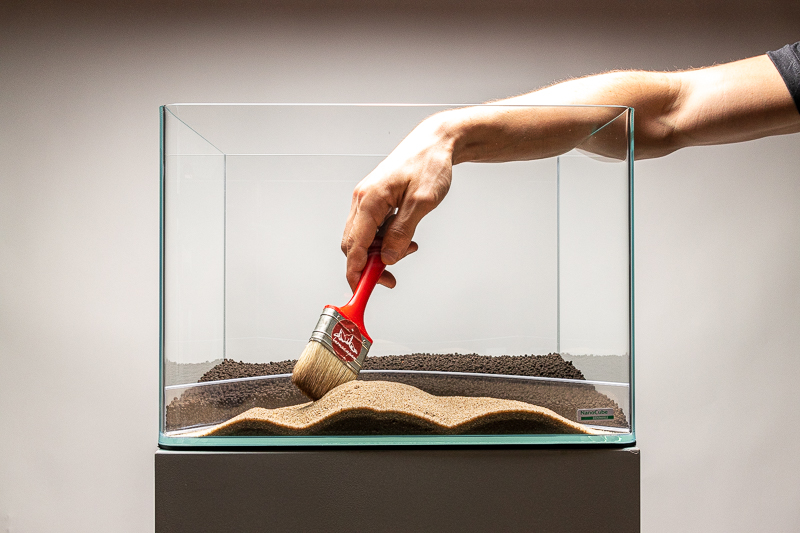
Next, add a layer of cosmetic sand in front of the divider. Keeping the sand layer against the glass, as thin as possible, will help to enhance the sense of perspective.
With the two layers of substrate in place, add some additional soil to the back of the tank to provide some more height and planting room. Finally, fill in the sand toward the midground, so that the height of the sand matches the height of the soil at the divider. This is highly important, as it will help prevent the two layers from mixing when the divider is removed.
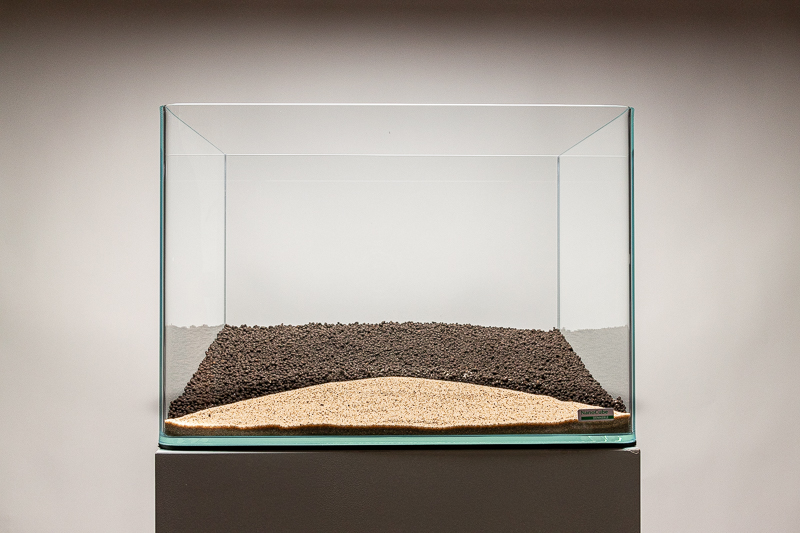
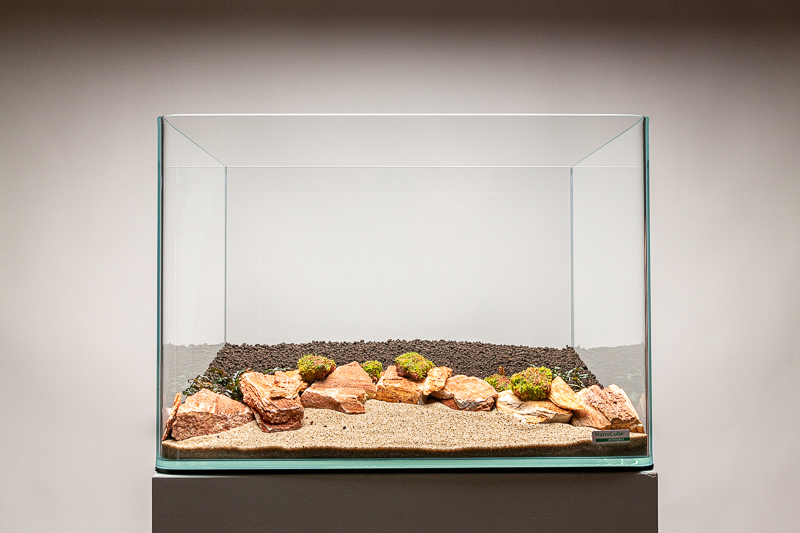
Using two hands, gently lift the divider to reveal the completed substrate.
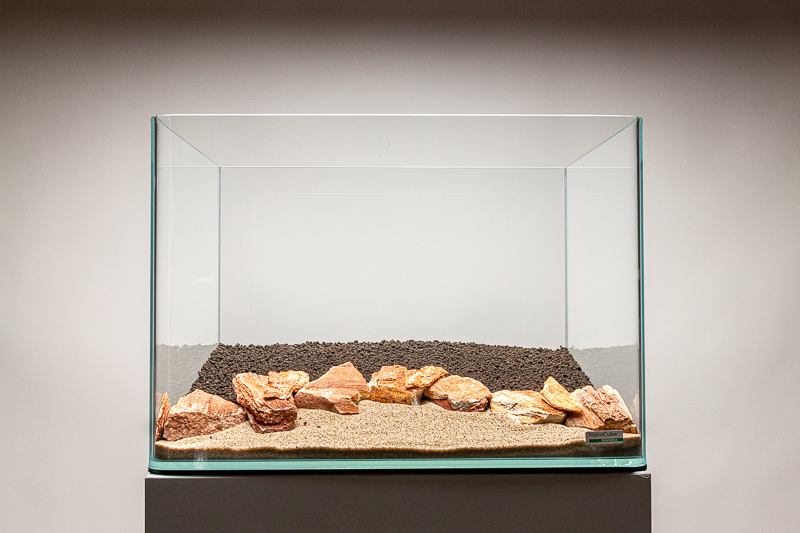
Next, we’ll add some stone along the border to further reinforce the boundary between the two layers. We’ve decided to use the beautiful Samurai stone, but you can select any hardscape of your preference.
With the stone border in place, it’s time to plant!
Today’s aquascape features a concave layout, meaning that tall plant groups are used in the left and right rear corners, while the center remains shallow.
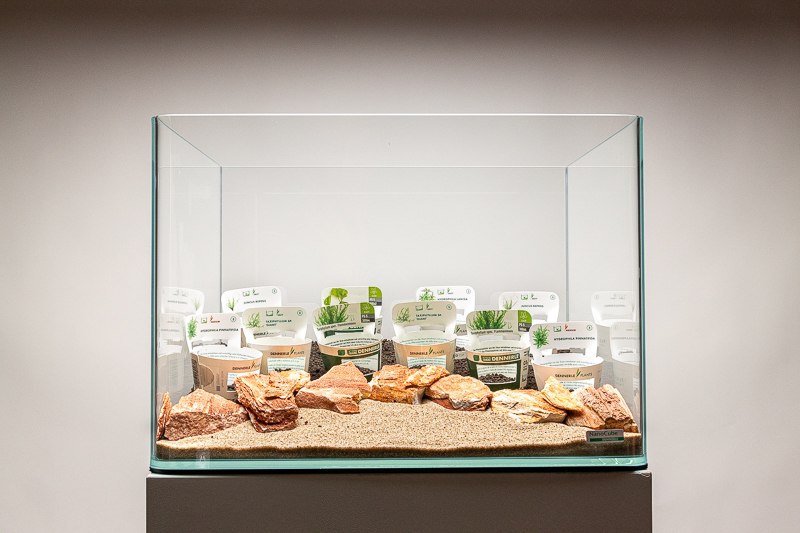
A planting map can be created to help guide the process. Use the plant labels to map out where each plant will go. We recommend one tissue culture cup, per palm size section of soil.
We’ll plant from front to back using PLANTIT! In-Vitro cups.
Planting the Midgroung
We’ll begin with the right side of the midground. Using a pair of aquascaping pincettes, plant one cup of Hygrophila pinnatifida. Depending on the lighting, nutrients, and CO2 levels of your tank, this plant can display a variety of colors, from a dark green to a vibrant red.
Place one more cup of Hygrophila pinnatifida on the left side of the midground.
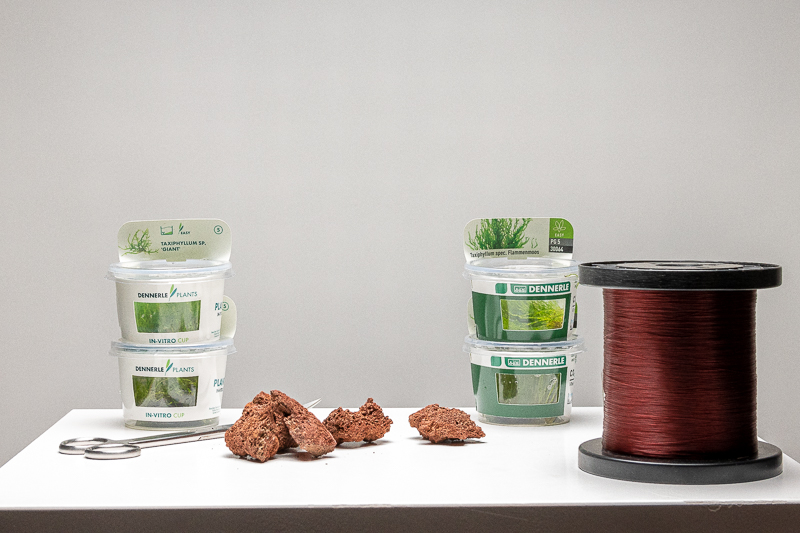
Next, we’ll create a transition using some lava stone wrapped in Flame Moss and Taiwan Moss.
These stones can be prepared ahead of the planting and kept aside in humid conditions, until you’re ready to use them. Tightly wrap the moss around pieces of hardscape using cotton thread. Be sure to wrap around the stone many times to ensure a secure attachment. Eventually, the moss will attach to the rock on its own, and the cotton thread will dissolve.
Alternatively a cyanoacrylate- based superglue can be used to adhere the moss to the stone.
Place the moss rocks in between the gaps of the Samurai stone. Eventually, the moss will spread and provide a natural, aged look.
Planting the background
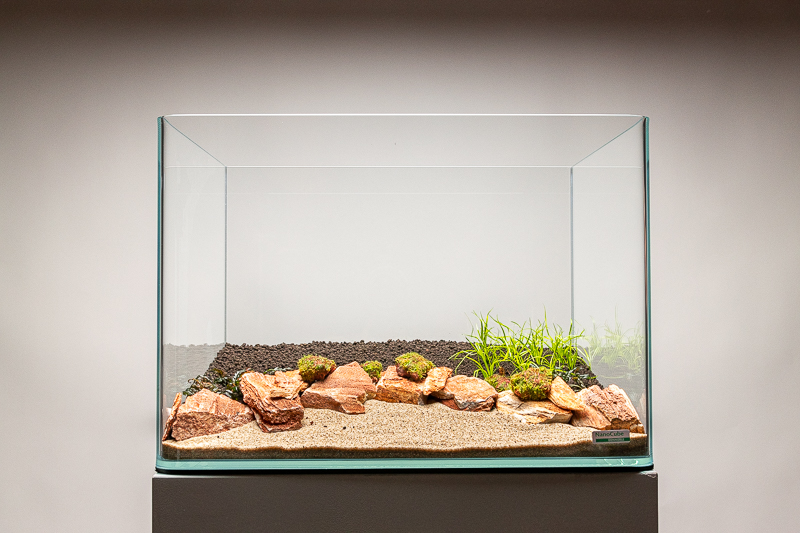
Now let’s plant the background. Starting on the right side, plant one cup of Juncus repens. This is a tall, grassy plant that creates a wild, jungle-like aesthetic.
Between plantings, be sure to keep the plants moist with a light spraying.
Working your way to the left, add one cup of Hygrophila lancea 'Araguaia'. This is a shorter, red plant that will help reinforce the concave layout by providing some height contrast in the back; The taller Juncus repens will slope downward toward the shorter Hygrophila lancea 'Araguaia'.
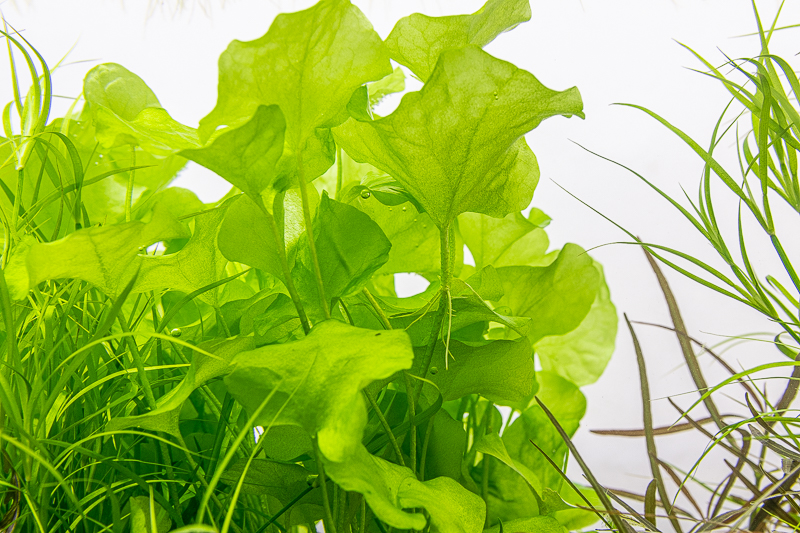
Continuing to the left, plant one cup of Nymphoides sp. 'Taiwan'. This is a very fast-growing bright green plant that will contrast well next to the Hygrophila lancea 'Araguaia'.
Finally, mirror the right side of the background by planting the left, rear corner with one more cup of Juncus repens. This will complete the concave look.
Now it’s time to fill the tank with water and attach the hardware
Now that we’re finished planting, it’s time to fill the tank with water and attach the filter and CO2. A filter bacteria solution is added to help establish the beneficial bacteria as well as 1 cup of Salvinia auriculata (helping plant) that will help absorb excess nutrients.
Maintenance routine:
- For the first week, we recommend doing daily 50% water changes, as the new soil will be releasing ammonia.
- In the second week, we advise water changes every other day.
- During the third week, you’ll do water changes every two days, and so on, until you get to one 50% water change per week.
- A complete liquid fertilizer can be added two weeks after setup and dosed daily or weekly, depending on your lifestyle.
- Light and CO2 are best set on a 7h/day timer
Evolution of the aquascape
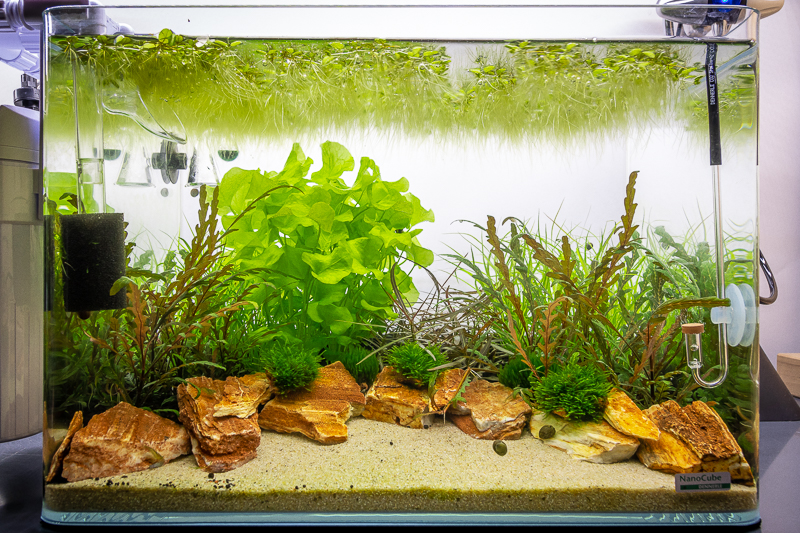
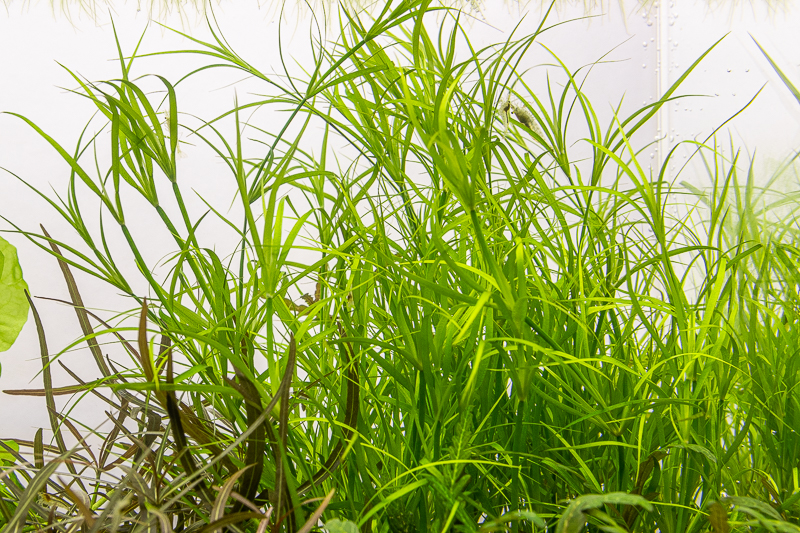
Two weeks after setup, the plants have adapted well and have grown significantly.
The fast-growing Nymphoides sp. 'Taiwan' is trimmed to stimulate compact, bushy growth and to keep the height in check. Also the amount of the floating plant Salvinia auriculata (helping plant) has been reduced.
A small algae crew of horned-nerite snails and Amano Shrimp are added to help keep algae and diatoms at bay.
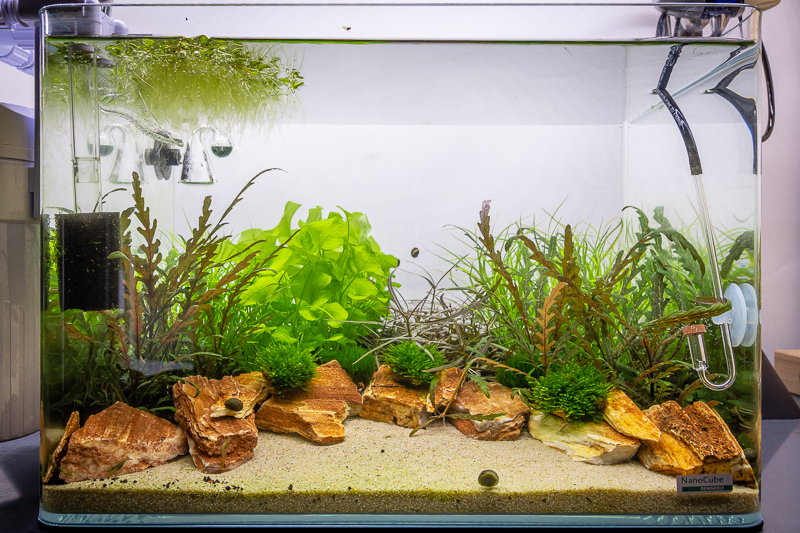
Six weeks after setup, the plant height and coloration has improved significantly.
The Hygrophila pinnatifida is trimmed low, to promote healthy, colorful growth.
Frequent trimmings will stimulate the growth of compact, vibrant leaves with this plant.
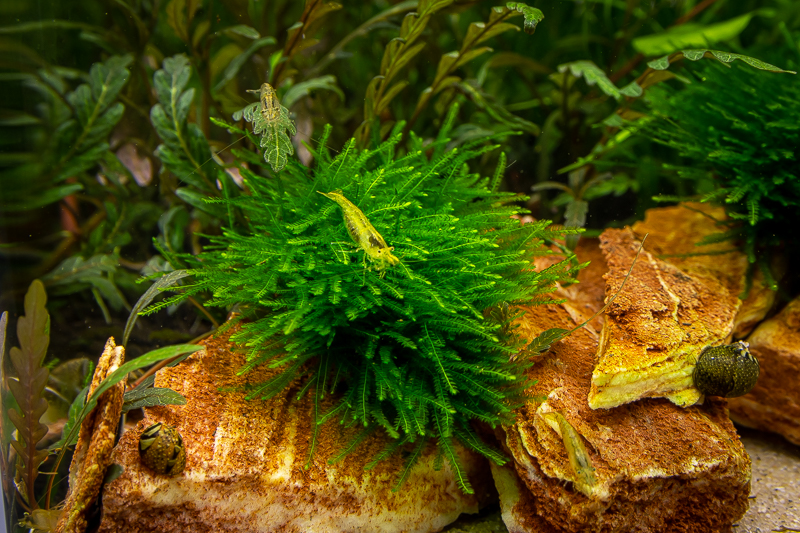
The shrimp enjoy the dense coverage that the Taxiphyllum alternans 'Taiwan' Moss provides.
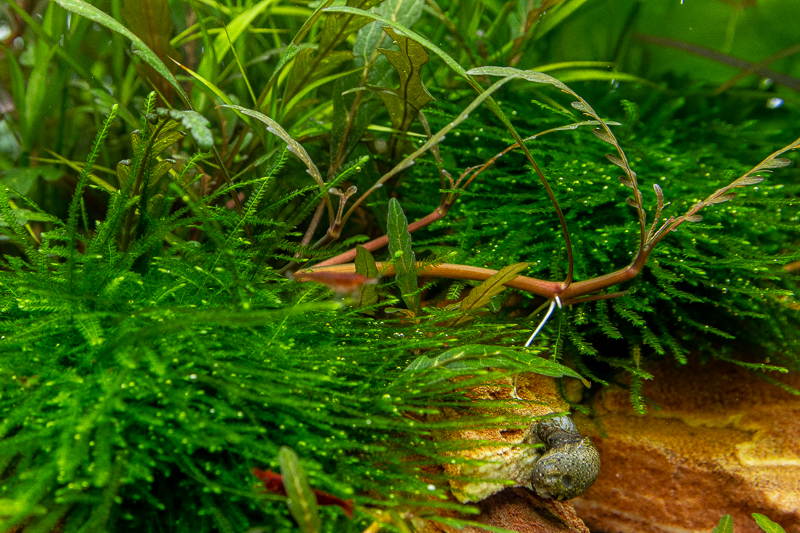
Healthy roots stretch their way throughout the hardscape as the plants spread out and fill in.
Final stage
Eight weeks after setup, the aquascape has matured beautifully and is ready for its final picture.
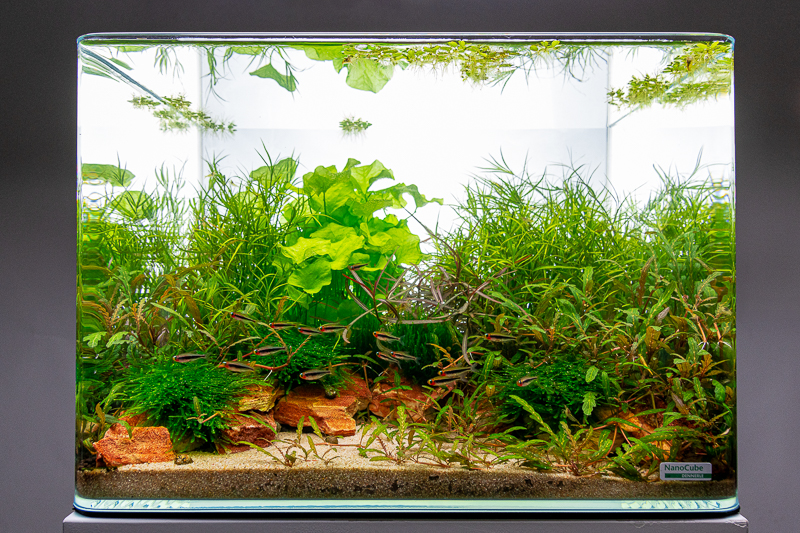
We’ve decided to call this layout Tucano Bay, named after the fish that we’ve added, the Tucanoichthys Tucano.
These tetra are named after the Tucano Indians, which are native to the upper rio Negro and rio Uaupés regions of the Amazon.
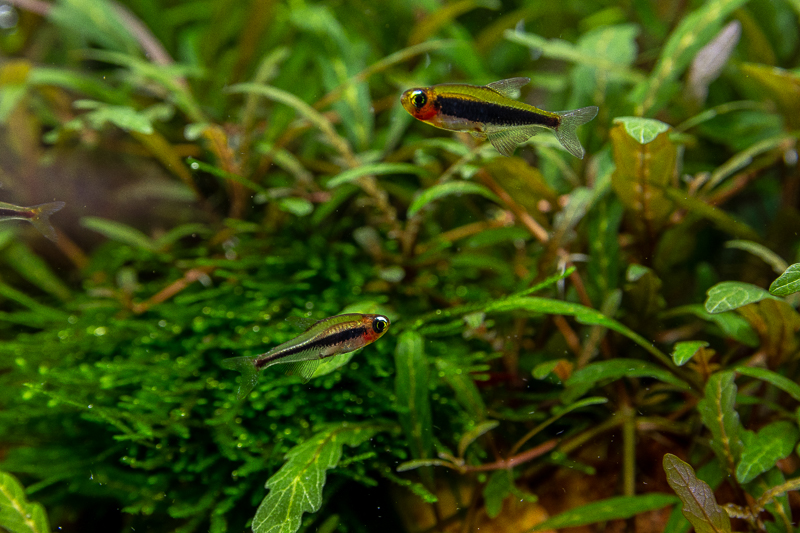
The Tucano tetra is naturally found in a 200 meter stretch of a small blackwater creek. The planting in this layout symbolizes the lush rainforest, while the cosmetic sand embodies the riverbed.
Details
|
Creator:
|
Jurijs Jutjajevs
|
|
Title:
|
Tucano Bay
|
|
Aquarium:
|
40x32x28cm aquarium
|
|
Volume:
|
35 liters
|
|
Light:
|
LED 18watt 8h/day
|
|
Substrate:
|
Soil (4 liters)
Cosmetic Sand (1 liter)
|
|
Hardscape:
|
Samurai Stone (500g)
|
|
Filter:
|
Hang on the back filter (360 l/h)
|
|
Filter media:
|
Bio-filter material and fine filter pad
|
|
Co2:
|
Pressurized CO2 with Solenoid 30mg/l
|
|
Fertilizer:
|
All-in-one fertilizer
|
|
Maintenance:
|
30 mins per week
|
Plants:
2x Juncus repens
1x Nymphoides sp. 'Taiwan' (helping plant)
1x Hygrophila lancea 'Araguaia'
2x Hygrophila pinnatifida
2x Taxiphyllum sp. 'Flame Moss'
2x Taxiphyllum alternans 'Taiwan'
1x Salvinia auriculata (helping plant)
Livestock:
10x Tucanoichthys tucano
10x Clithon corona
20x Neocaridina sp.
(kindly provided by Aquarium-Dietzenbach and Aqualounge Jürgen Würz)
Back to list